

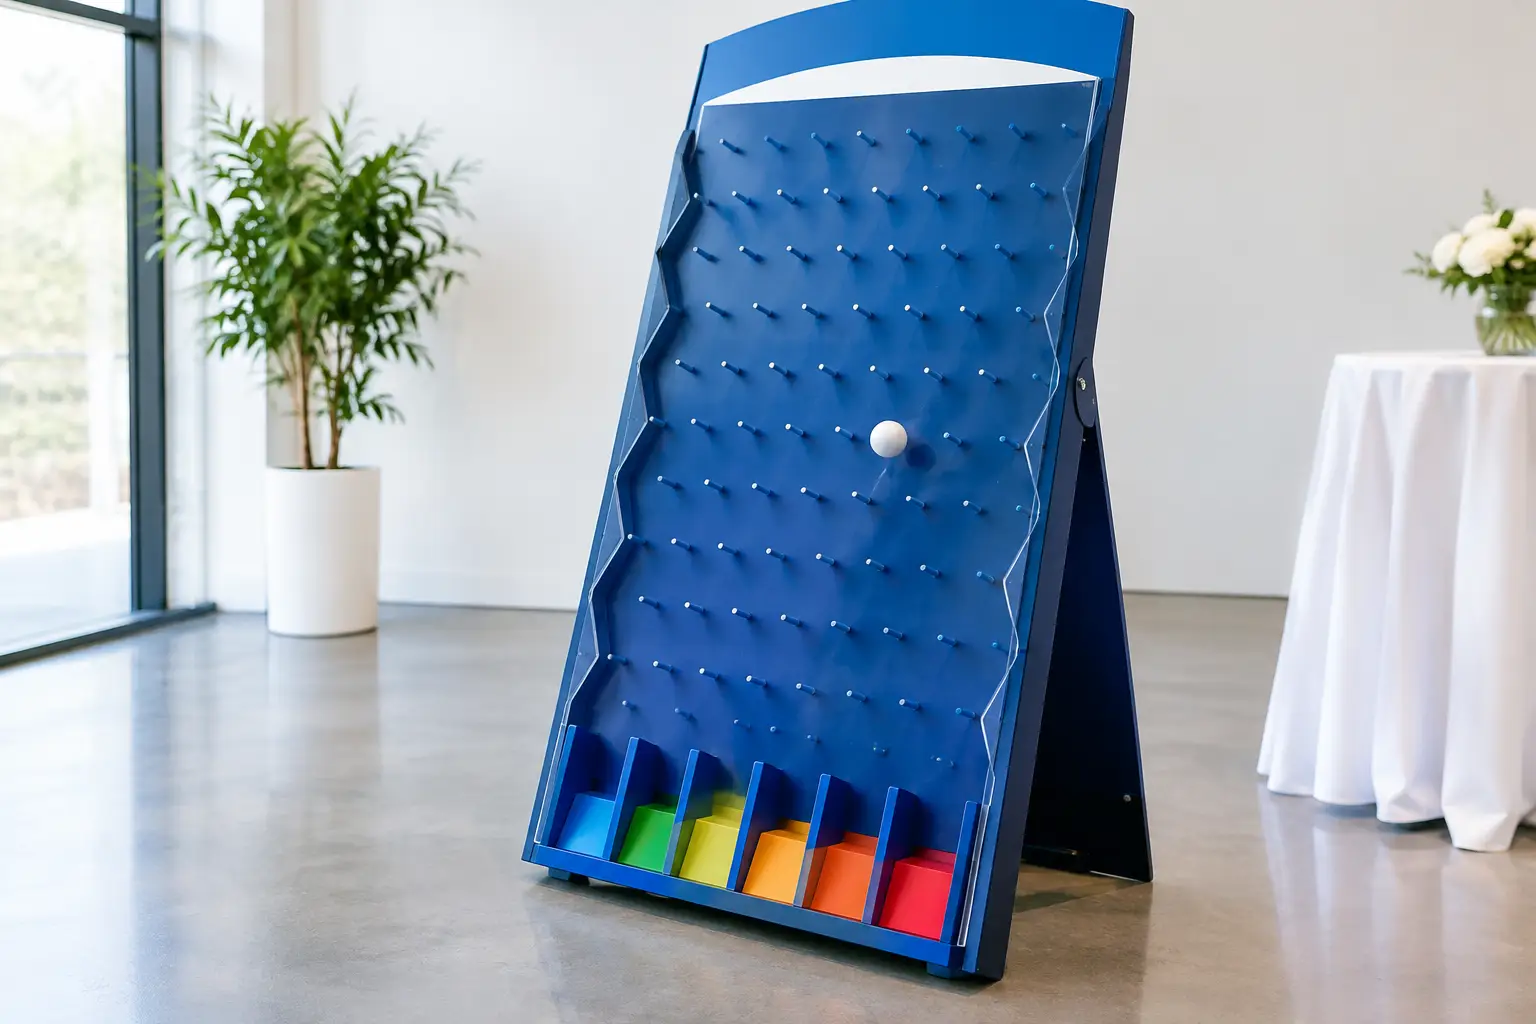
A Plinko board can pull people into a booth faster than a printed sign alone. The drop, bounce, and final prize slot create a simple reason to stop, play, and remember the brand. Successful plinko board making is not only about assembling pegs and a frame. It requires practical decisions about board size, visibility, print finish, prize layout, transport, and how often the unit will be used.
For a one-day retail activation, a lightweight board may be the right choice. For trade shows, restaurant promotions, school events, or repeated corporate campaigns, a stronger branded display will usually deliver better value over time. Start with the event setting and work backward from there.
Start Plinko Board Making With the Event Goal
Before choosing wood, acrylic, PVC, or print materials, decide what the board needs to accomplish. A prize game for lead generation needs room for a sign-up instruction, QR code, and clear prize terms. A retail promotion may need only branded slots for discounts, free samples, or gift cards. A company event may use the board as a staff engagement activity with department-specific prizes.
The goal affects every design choice. If the board is meant to collect customer details, the branding should make the next action obvious: scan, register, follow, visit, or redeem. If the purpose is product awareness, place the product image and logo where people can see them while they wait for their turn.
A Plinko game works best when the message is simple. Do not turn the board face into a flyer with too much copy. People should understand the activity from several feet away: drop a puck, land on a prize, take the next step.
Choose the Right Board Size and Build Material
Board size should match the venue, viewing distance, and available floor space. Smaller countertop boards work well for cash wraps, reception desks, food counters, and compact retail tables. A freestanding board is more visible in malls, exhibitions, campus events, and busy promotional spaces.
A practical countertop unit can be around 24 to 36 inches tall. A large event display often ranges from 48 to 72 inches tall, depending on the stand and prize layout. Larger boards create more visual impact, but they also need a stable base, a suitable vehicle for delivery, and a storage plan between events.
Material selection comes down to durability, budget, and finish requirements. Plywood is a common option for repeated use because it holds pegs securely and provides a solid structure. MDF offers a smooth surface for painted or laminated applications, although it must be protected from moisture. PVC foam board is lightweight and suitable for short campaigns or indoor use, but it is less resistant to hard handling. Acrylic can create a premium appearance and makes the peg pattern highly visible, though it costs more and requires careful fabrication.
For most commercial promotional boards, a wood or MDF core with a printed face panel is a practical balance. The structure can be built for durability while the graphic layer can be refreshed for a new campaign.
Consider the stand before fabrication
A board that looks good but wobbles during play is a poor event asset. Freestanding Plinko boards need an easel-style rear brace, a wide base, or a fitted display stand. The board should remain stable when someone drops a puck from the top, leans in to watch, or takes a photo beside it.
If the board will travel frequently, consider a removable stand or folding legs. This reduces transport space and makes the display easier for event staff to set up. Add protected corners or a custom carry case for larger units that will move between locations.
Build a Peg Layout That Plays Fairly
The peg field determines how the puck moves, so spacing matters. Pegs should be arranged in offset rows to create a consistent path of deflections from top to bottom. A crowded layout slows the puck and can cause jams. Wide spacing creates less action and makes the result feel too predictable.
For a standard board, use rounded pegs with enough projection to guide the puck without snagging it. Wood dowels, plastic pegs, or metal hardware can all work, but they should be firmly fixed and smooth to the touch. Avoid sharp fasteners, loose pieces, or exposed hardware that could catch clothing or scratch the printed surface.
Test the board repeatedly before finalizing the prize slots. Drop pucks from different positions across the top. Watch for slots that receive too many wins, dead areas where the puck sticks, or bounce patterns that send pucks outside the playing area. Small adjustments to the lower pegs, side rails, or dividers can improve performance considerably.
The bottom section needs clear prize pockets. Deep dividers help prevent a puck from rolling into another slot after landing. Use large type and high-contrast colors so players, staff, and spectators can identify the result immediately.
Design the Printed Face for Fast Recognition
A Plinko board is a display product, not just a game. Its printed face should support the campaign from across the room and in photos shared after the event. Keep the logo prominent, use brand colors consistently, and reserve high-visibility areas for the campaign message.
The upper header is usually the best location for the main logo or event name. The center area can carry a product visual, slogan, pattern, or short call to action. The prize slots should have enough contrast to read quickly. If every section uses similar colors and small text, the game becomes harder to follow.
A full-color printed vinyl graphic with lamination is a practical choice for many boards. Matte lamination reduces glare under trade show lighting and can make text easier to photograph. Gloss lamination gives colors more pop, but overhead lights may reflect on the board surface. For premium short-run campaigns, consider a mounted rigid print with spot UV accents on the logo or selected graphic elements. These details work best when they support the design rather than compete with the play area.
Use vector artwork for logos and large-format graphics whenever possible. Raster images should be supplied at sufficient resolution for the finished board size. A file that looks acceptable on a phone screen can appear soft or pixelated on a 60-inch display.
Plan Prize Slots, Rules, and Replacement Graphics
Prize slots should be based on actual inventory and promotion rules. If you have 20 giveaway items, do not design five prize categories that staff cannot fulfill consistently. Easy options include percentage-off offers, branded merchandise, samples, gift cards, food items, and entry into a larger drawing.
For campaigns that change often, make the prize labels replaceable. Printed inserts, magnetic labels, or slide-in cards let the same board support multiple promotions. This is useful for retailers running monthly offers, event teams attending several shows, or restaurants changing seasonal specials.
Display game rules where participants can see them before playing. Keep the wording short: one play per person, while supplies last, eligibility requirements, and prize redemption details. For sweepstakes, purchase-related promotions, or any campaign with regulated prize rules, review local and state requirements before printing final signage. A visually strong game should not create confusion at the counter.
Make Transport and Setup Part of the Specification
A well-made board can still become expensive if it is awkward to move or slow to assemble. Measure the board against doorways, elevators, storage shelves, vehicle cargo space, and the event booth footprint. Include the puck container, replacement prize labels, rule sign, and hardware in the packing plan.
For recurring activations, create a simple setup checklist for staff. It should cover stand assembly, board positioning, puck quantity, prize stock, cleaning, and photo-ready placement. This prevents the common problem of arriving at an event with a great board but missing the pieces needed to run it.
Seaonce customers can also coordinate the surrounding event materials, such as banners, table covers, flyers, stickers, branded bags, and giveaway items, so the game display matches the rest of the promotion.
Order the Board Around Its Real Use Cycle
The lowest initial price is not always the best purchase decision. A single-use indoor board can be produced economically with lighter materials and a direct-mounted graphic. A display intended for a full trade show calendar needs a stronger structure, protected print surface, replaceable prize components, and a reliable stand.
Ask for specifications that reflect the actual use cycle: finished dimensions, substrate thickness, print method, lamination, stand type, peg material, number of prize slots, and packing requirements. Clear specifications reduce revisions and help compare quotes accurately.
A Plinko board earns its place when it is easy to understand, hard to ignore, and simple for staff to operate. Build it for the environment where it will be used, print it for quick brand recognition, and keep the prize system flexible enough to support the next campaign.